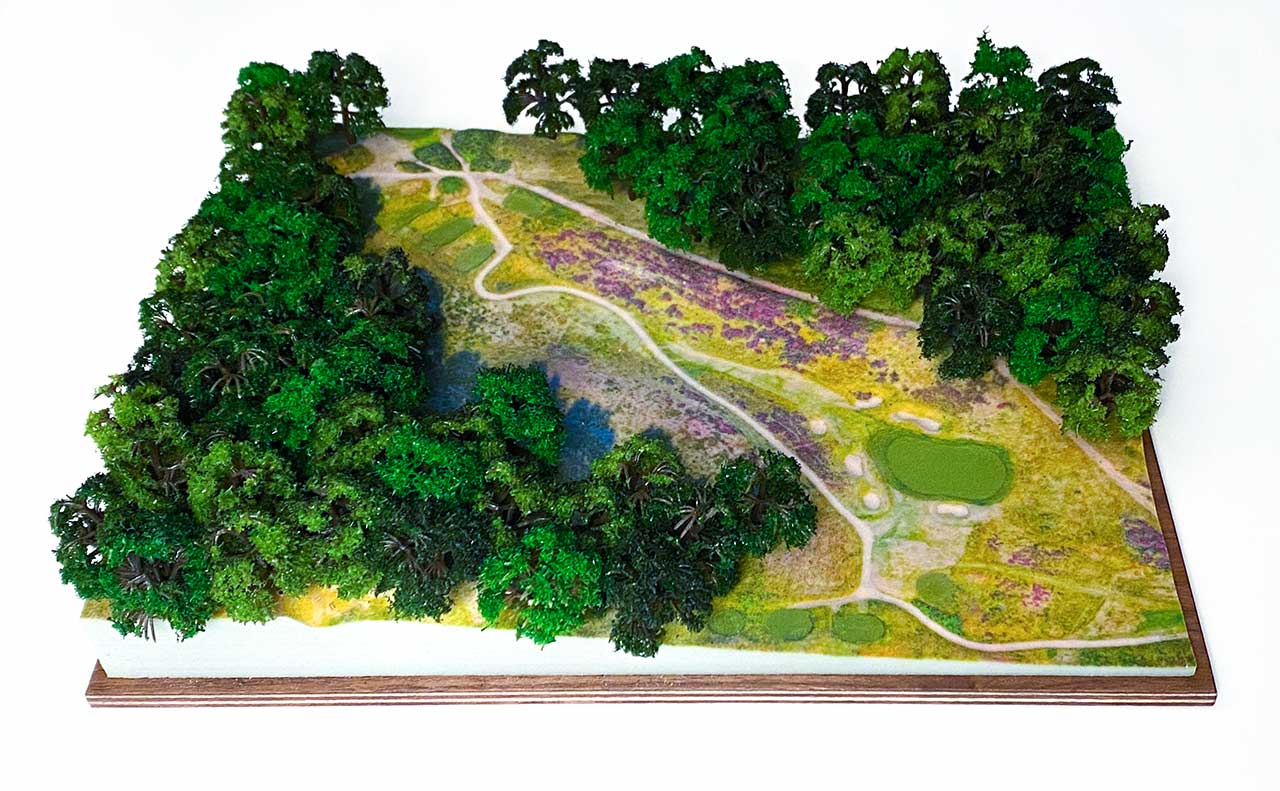
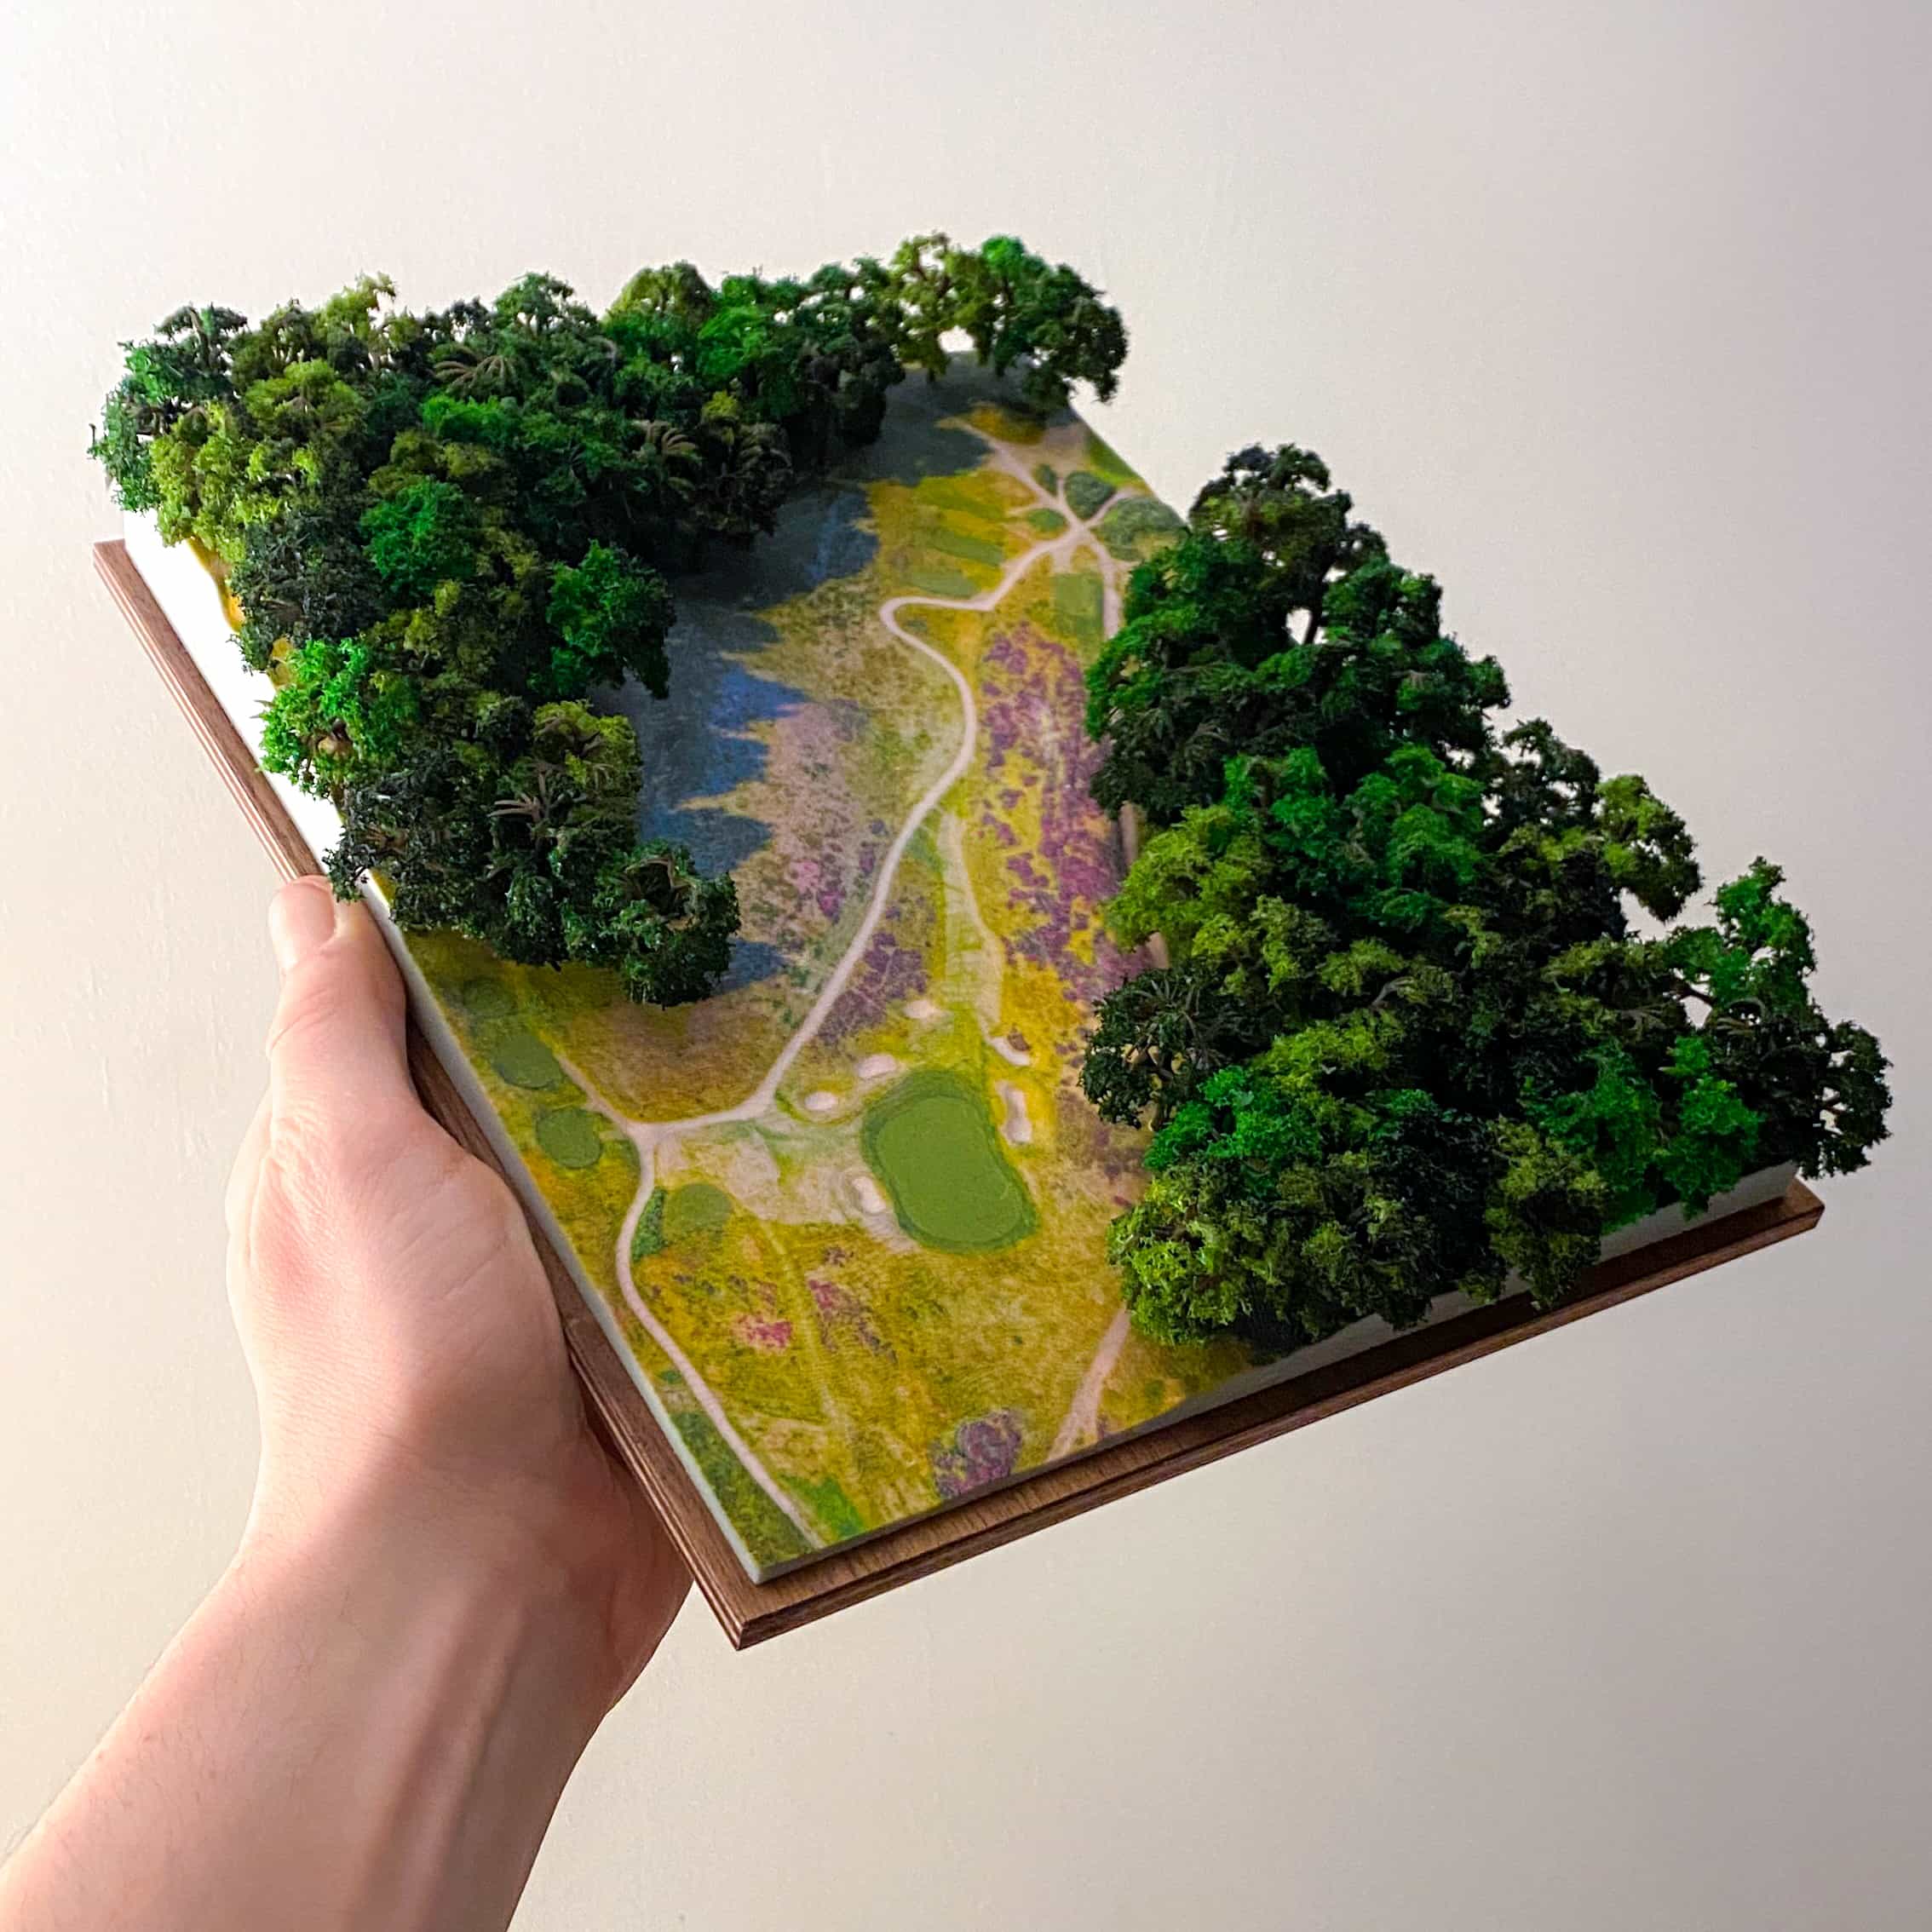
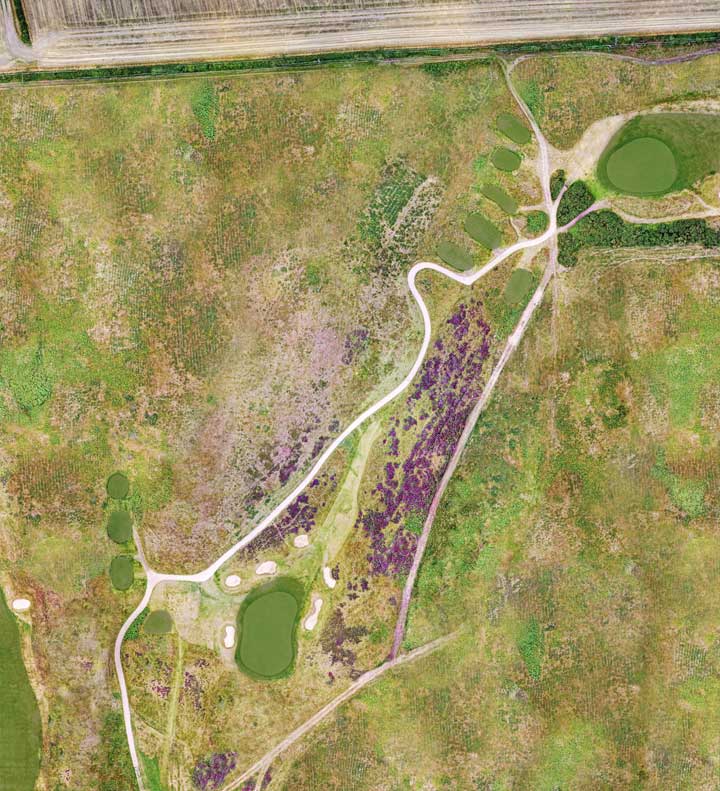
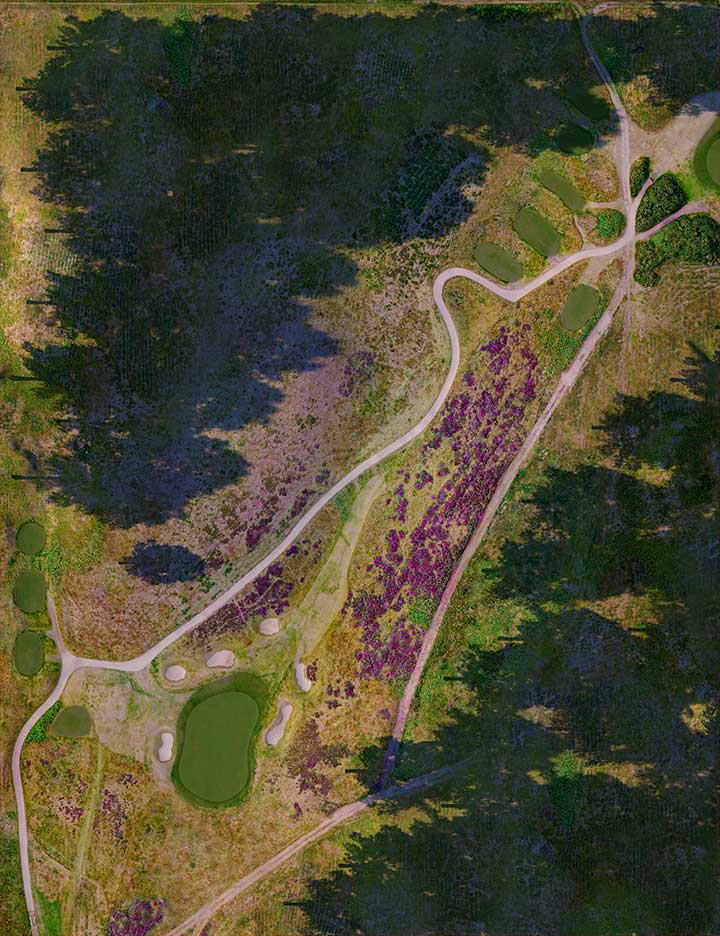
ollinwell's excellent 13th provided the perfect subject matter for this article. It's a beautiful hole and is a great test of golf, but it also plays dramatically downhill from tee to green and, importantly, cuts through a mature forest. Trees, in short, can be a bit of a nightmare, but I'll cover that challenge in some detail later.
- Digital Elevation Data
- Aerial Imagery
- Light and Shadow
- Physical Model Preparation
- Trees
Step 1: Digital Elevation Data
Digital Elevation Models, or DEMs, can be acquired in several different ways, but in this example, I've used data and imagery gathered via a drone survey. Get in touch if you need a golf course survey.
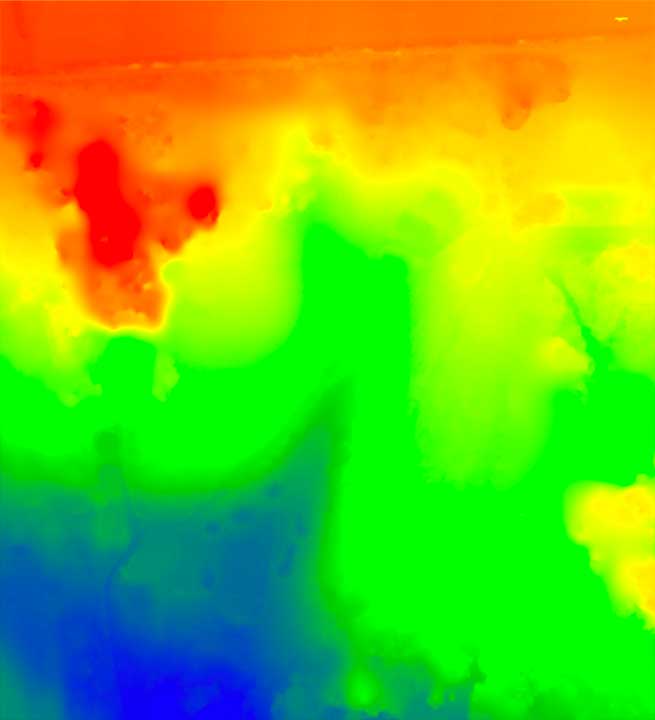
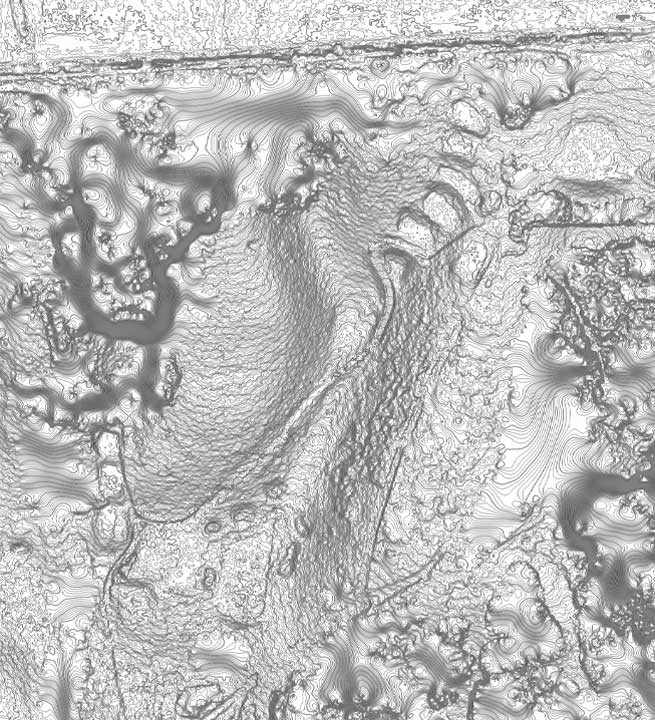
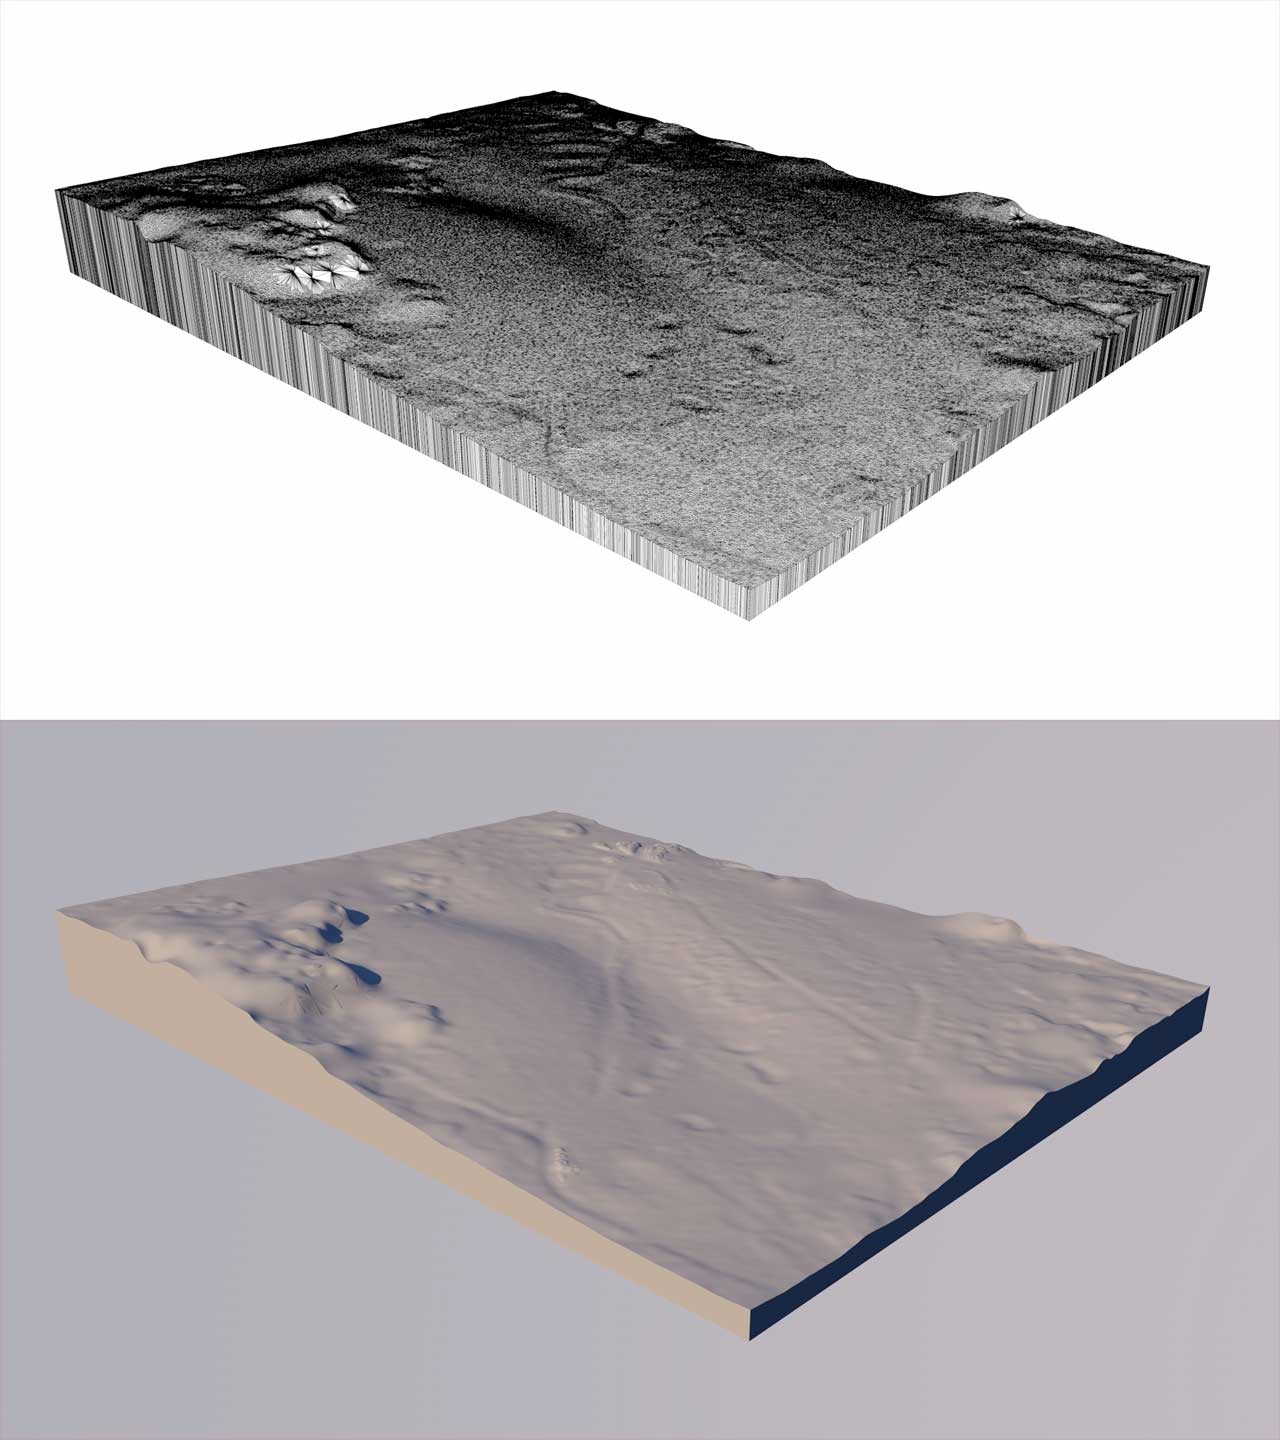
The data is first cleaned and prepared, removing unwanted surface objects like trees, foliage and structures, leaving only bare earth. Here are a few ways of viewing that remaining data:

I then turn this raw data into a model mesh, which can be viewed and manipulated in 3D software.
Step 2: Aerial Imagery
As well as the spatial data, the drone captures very high resolution photographs of the site. These photos are geo-referenced, meaning they line up exactly with the digital terrain data.
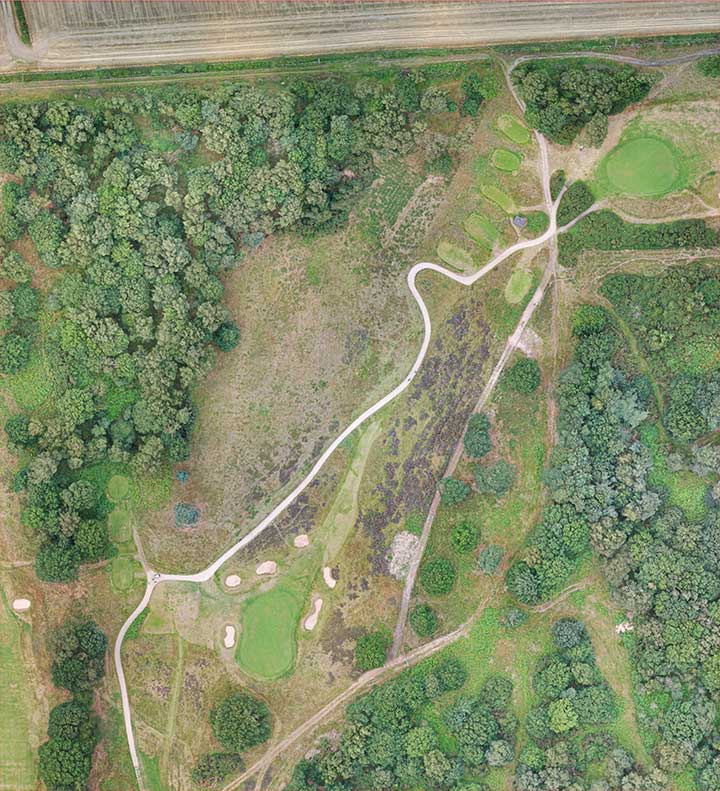
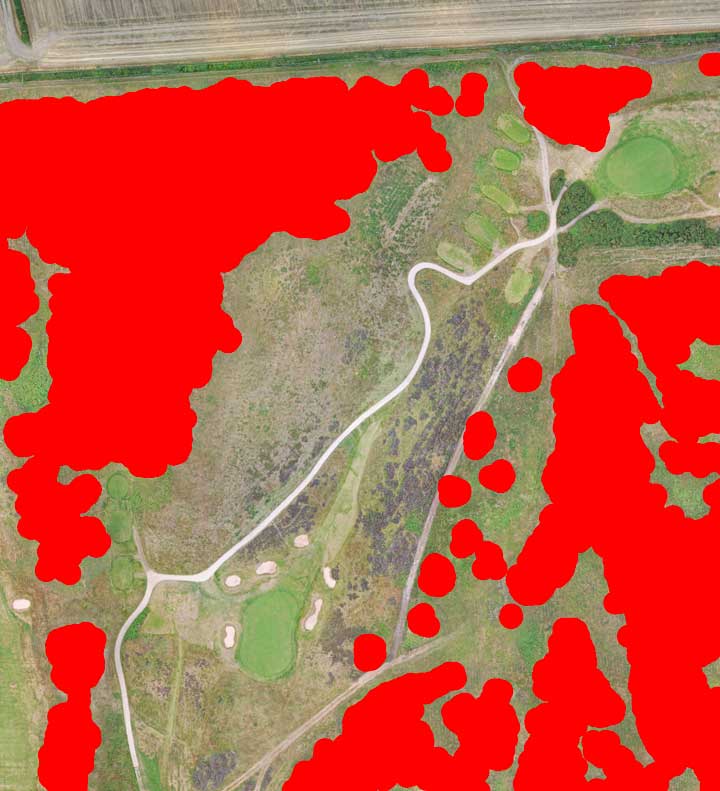
Obviously the photograph contains the trees – I need to get rid of those, replacing them with the equivalent of rough grasses. I also need to enhance the tees, fairway, fringe and green, and generally try to improve the overall appearance of the image.
Although I've removed the trees, I need to know where they were, so that I can add them to the 3D model later, in the correct places.
Step 3: Light and Shadow
Once I've prepared my textures (the images that are projected onto the surface of the terrain mesh), I can start to add some more drama and depth to the model, using digital lighting.
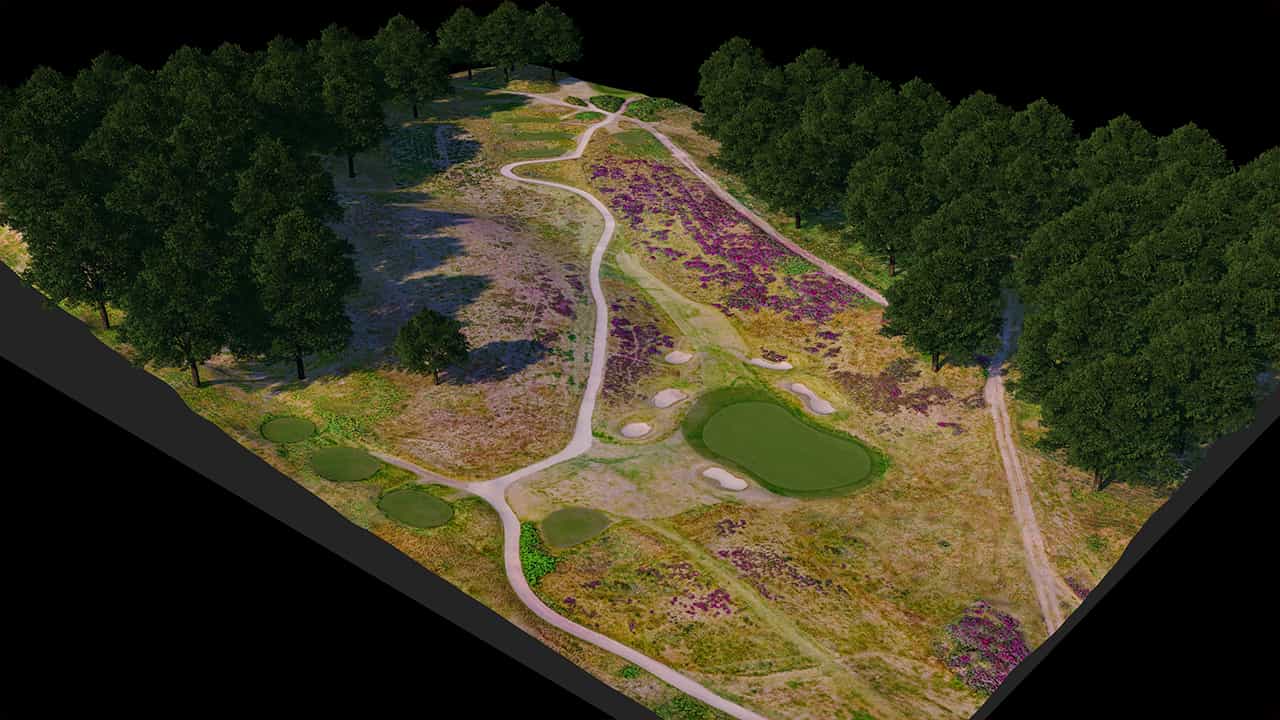
Using my tree map, with its red guides, I insert 3D model trees, which act as shadow-casting objects. I then remove the 3D trees, but keep their shadows. The resulting model state can be exported, or 'baked', as a single image.
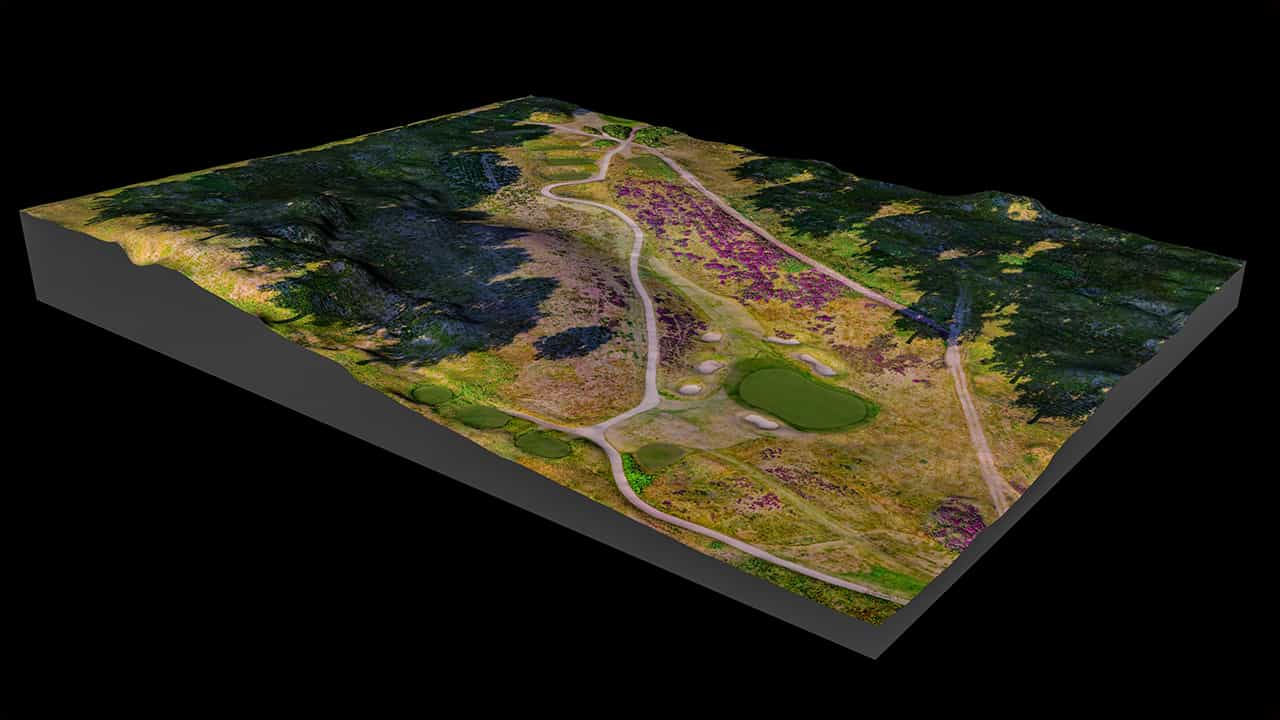
I love traditional cityscape or landscape model installations, but most of the ones I've seen need a custom lighting rig to be assembled on site in order to generate shadows and enhanced contours – this can be very expensive – so I've tried to incorporate shadows into my models, meaning they can be displayed anywhere, without the need for a costly lighting setup.
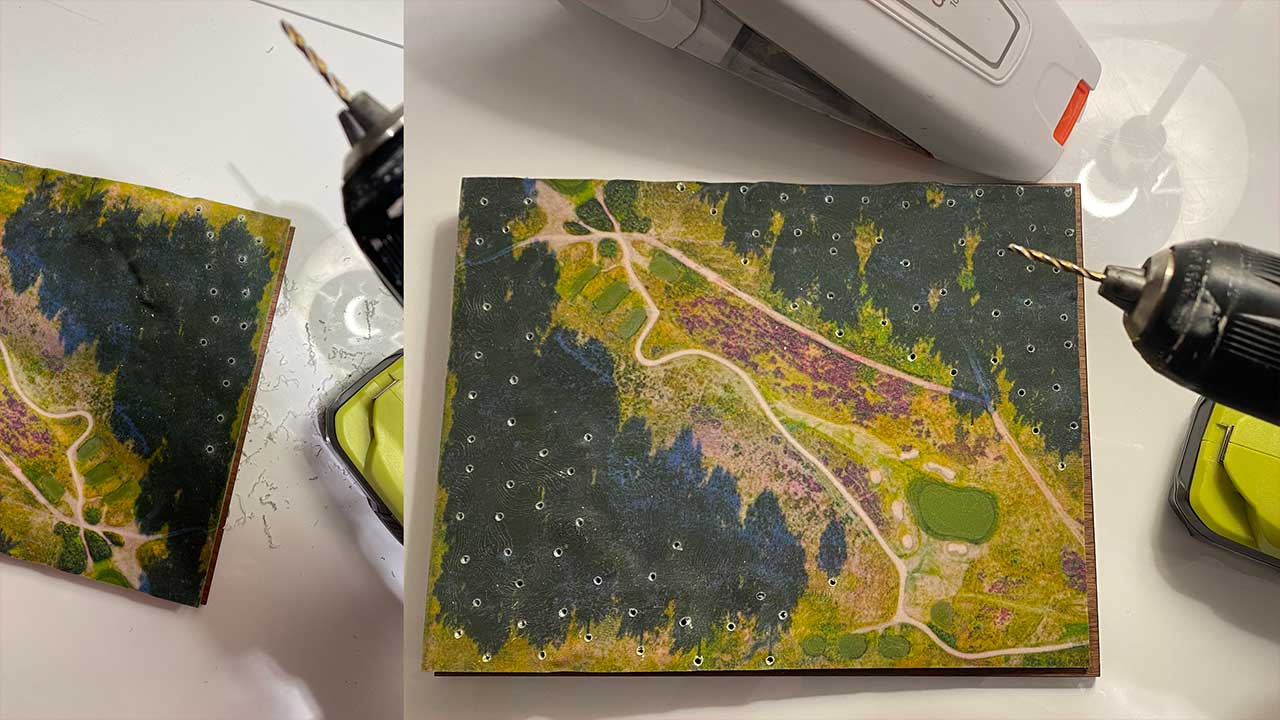
Step 4: Physical Modelling
3D printing has its limitations. Right now, only a handful of substances can be used for full colour 3D printing, and even fewer of these are really affordable. Another crucial limitation is in the printing of complex tree objects. Simplified, low-complexity trees are fine, but anything with spindly-looking branches and leaves, and other fine details, will fall apart in the print process, or shortly after that. There's a range of other reasons why trees present major problems to model makers, but I won't go there right now!
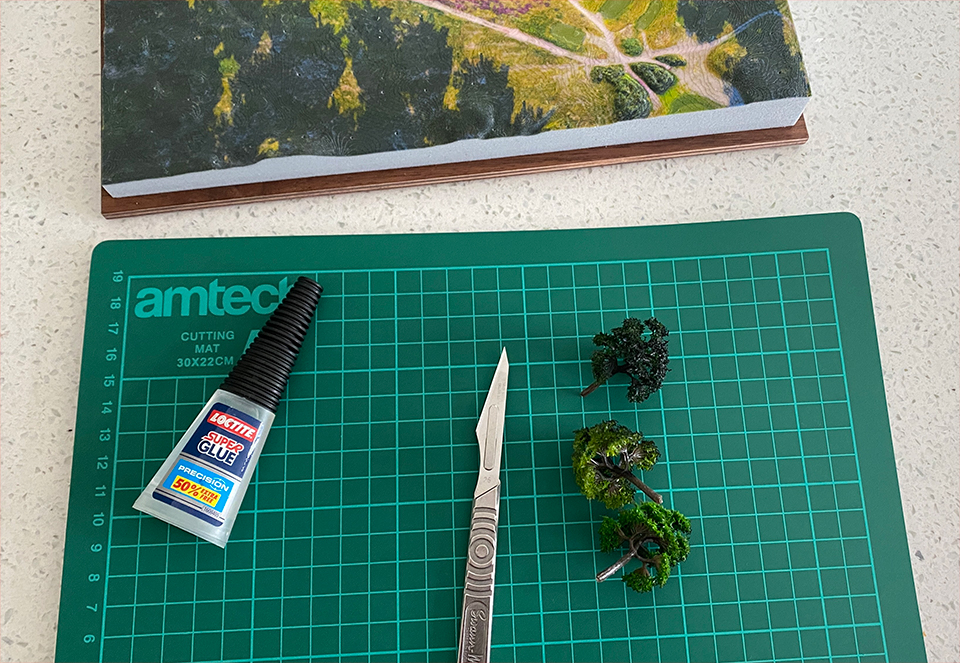
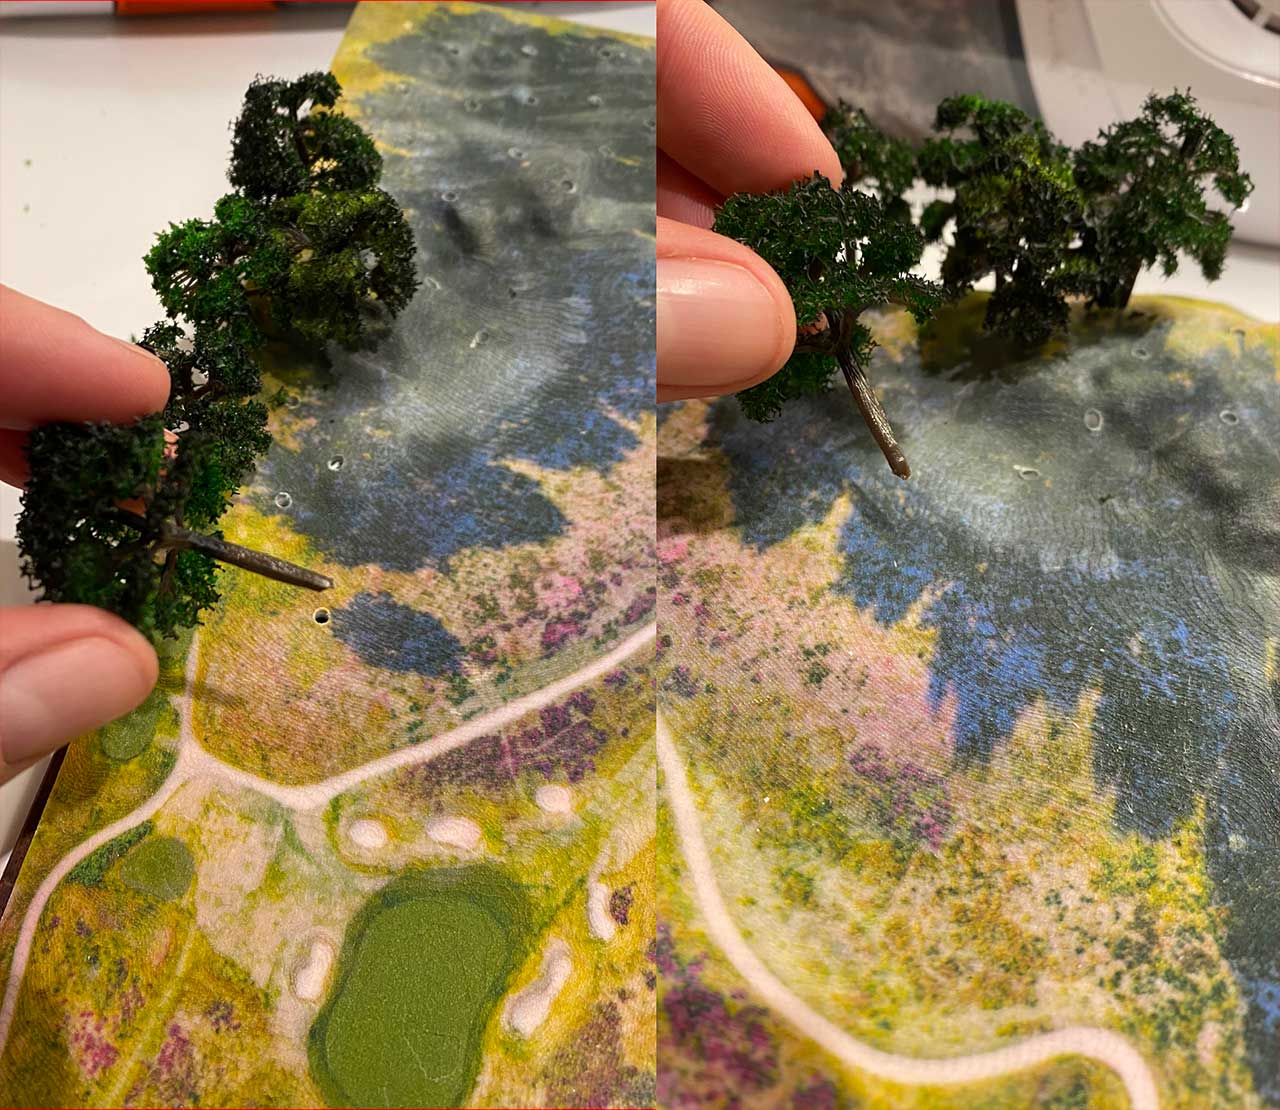
Before 3D printing, I add very small 'pin hole' guides to the model surface using the 3D software, showing where the tree trunks intersected with the ground. These act as pilot holes for my drill – I was very reluctant to start drilling into the model, but it was important that the holes were exactly the right size to house the mini tree modes.
Step 5: Trees
The mini trees need some preparation before being added to the main model. Importantly, one side of each each tree needs to look like it's in shadow.
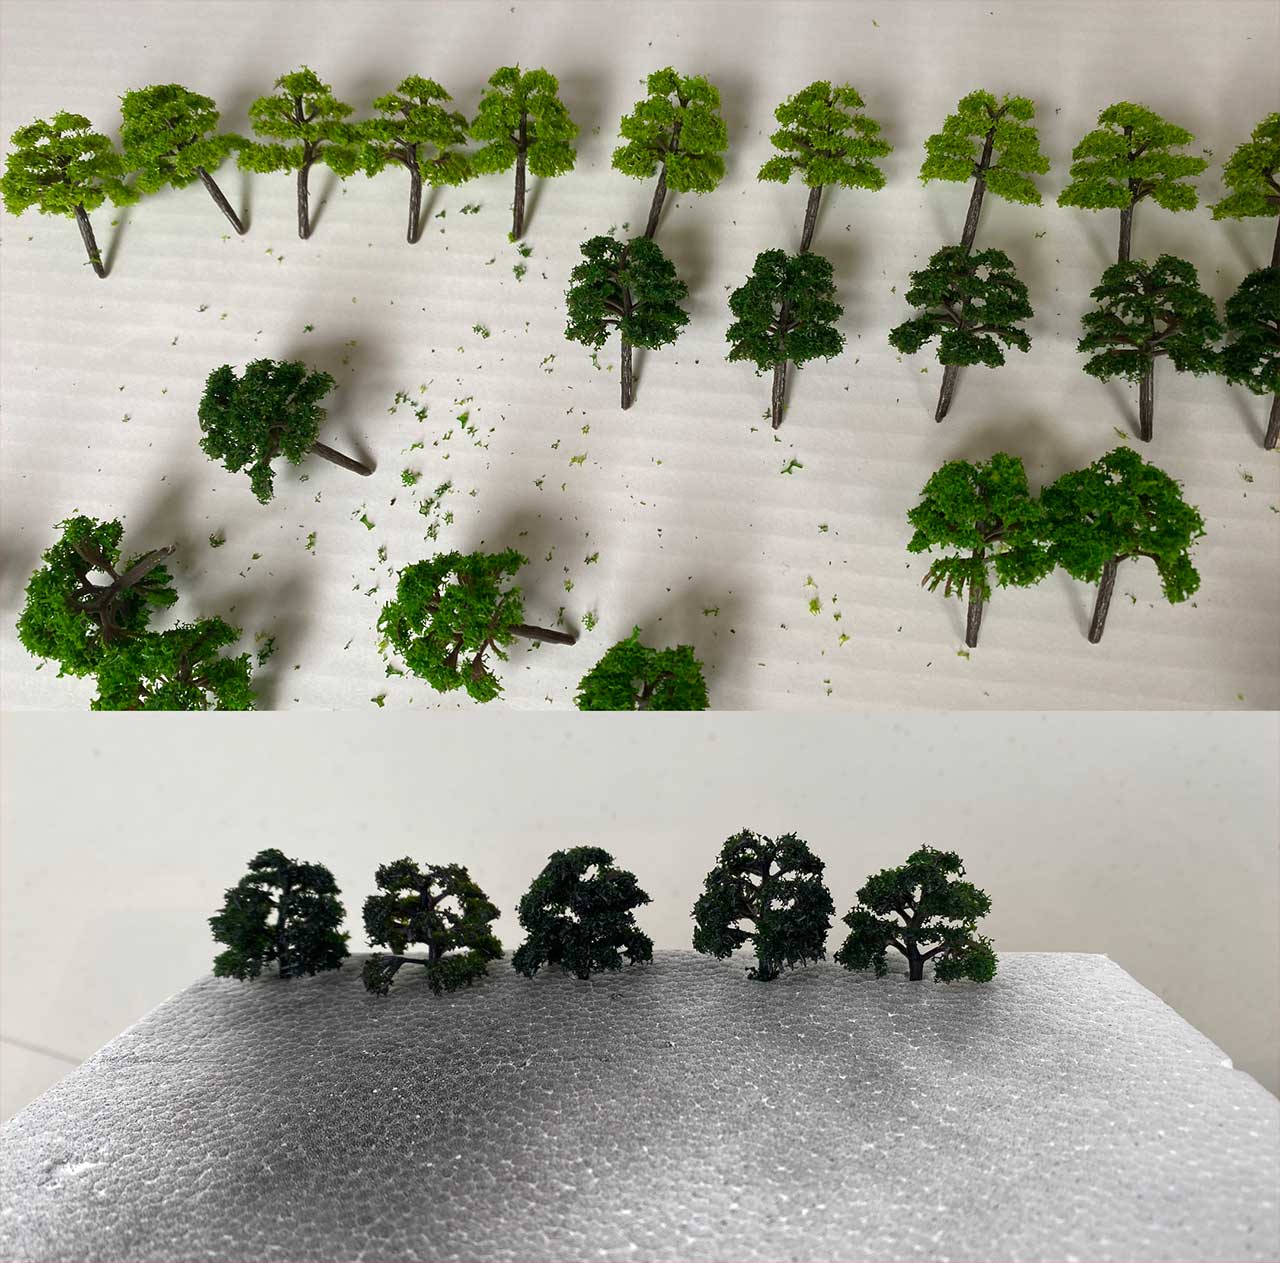
After a small amount of nip and tuck with a sharp knife, the trees are ready to be glued in place.